This guide will explain the perks, traits, armors, and weapons necessary to get the most out of Unarmed weapons, while providing the player with the highest Damage Threshold that the player can actively maintain. The build also comes with some critical hit elements, as they allow it to out-damage nearly every other build in the game.
Quick notes and tips before we get into the build:
- Lonesome Road DLC recommended. While the bulk of the build can be acquired without any DLC, the more DLC you have, the more you’ll be able to accomplish. The most important of the DLCs is the Lonesome Road DLC, as it contains the 2 most powerful unarmed weapons in the game.
- High DT survival. Due to the nature of Unarmed builds, you will have to get very close to enemies, which will definitely result in getting hit quite often. To ensure the player’s survival, this build focuses on having the highest possible Damage Threshold.
- Chem usage. Chems are powerful with most builds, but they are far more powerful with melee/unarmed builds, thanks to chems like Rushing Water (from the Lonesome Road DLC) or the Weapon Binding Ritual (from the Honest Hearts DLC).
- Poisons. Poisons are a very underused mechanic that allows the player to coat their melee/unarmed weapon in a poisonous substance. After doing so, the next enemy hit with that melee weapon will take additional damage. Poisons will be explained in further detail later on in the guide.
Starting Stats
S.P.E.C.I.A.L.
Due to the effect that Strength has on Unarmed weapon damage, and the increased demand that this build’s playstyle puts on the player’s HP, a high Strength and Endurance are both recommended.
My recommended starting S.P.E.C.I.A.L. stats are as follows:
| Strength | 10 |
| Perception | 5 |
| Endurance | 7 |
| Charisma | 1 |
| Intelligence | 5 |
| Agility | 6 |
| Luck | 6 |
Skills
For your tagged skills, go with the following:
Unarmed – The Unarmed skill is going to be your main combat skill throughout the game. Maxing it out as soon as possible is highly recommended.
Repair – Seeing as unarmed weapons do not require ammunition, the only expense connected with them is the cost of repairing them as they get damaged. The repair skill is an integral part of doing it cheaply and effectively, whether that be through the creation of Weapon Repair Kits, or through the Jury Rigging perk.
Survival – Survival is an amazing skill for Unarmed builds, as it allows the player to craft many poisons and certain healing items and chems. If the player is so inclined, they may also use the skill to craft fairly powerful armors, as long as they have the Honest Hearts DLC installed.
Traits
Traits are almost down to personal preference, as none are integral to the build.
If you’d like to have a head start in the game, you can pick the Good Natured and Skilled (Old World Blues DLC required) traits.
If you’d prefer to have some more power in combat instead, you can go with the Hot Blooded (Old World Blues DLC required) and Built to Destroy traits instead.
One important tip: Do NOT pick the Heavy Handed trait. While it does provide a 20% damage increase, it almost completely kills any potential for critical hits, which are rather common and powerful in many circumstances with most Unarmed weapons.
Perks
As far as perk choices go, they are mostly a combination of Critical Hit perks, survivability perks, and a couple of Unarmed-related perks.
The perks are listed in leveled order. If several perks can be acquired at the same level, they are listed in the order in which I recommend taking them.
| Perk Name | Requirements | Benefits |
| Confirmed Bachelor / Black Widow | Level 2 | +10% Damage against male human characters. Additional dialogue options with male human characters. |
| Lady Killer / Cherchez La Femme | Level 2 | +10% Damage against female human characters. Additional dialogue options with female human characters. |
| Educated | Level 4, Intelligence 4 | +2 Skill Points per Level |
| Toughness | Level 6, Endurance 5 | +3 DT per rank |
| Stonewall | Level 8, Endurance 6, Strength 6 | +5 DT Against Melee and Unarmed attacks. Cannot be knocked down during combat. |
| Finesse | Level 10 | +5% Critical Hit Chance |
| Nerd Rage! | Level 10, Intelligence 5, Science 50 | +15DT While under 20% HP. |
| Piercing Strike | Level 12 | Ignore 15 points of a target’s Damage Threshold |
| Life Giver | Level 12, Endurance 6 | +30 HP |
| Fast Metabolism | Level 12 | +20% HP restored from Stimpacks |
| Better Criticals | Level 12, Perception 6, Luck 6 | +50% Critical Hit Damage |
| Adamantium Skeleton | Level 14 | -50% Limb Damage taken |
| Chemist | Level 14, Medicine 60 | Doubles the duration of all consumable items (including Stimpacks and RadAway in Hardcore mode) |
| Paralysing Palm | Level 18, Unarmed 80 | Gives a 30% chance to replace a regular V.A.T.S. attack with one that stuns an opponent for 30 seconds. |
| Slayer | Level 24, Unarmed 90, Agility 7 | Increases your Unarmed weapon attack speed by 30% |
| Implant GRX | Level 30, Endurance 8 | Non-addictive Turbo injector. Lasts 2 seconds on rank 1, and 3 seconds on rank 2. |
| Ain’t Like That Now | Level 50, Low Karma | Karma reset to 0. Immunity to Critical Hits, +20% Attack Speed, +25% AP Regeneration Rate. |
Special Unarmed Moves
There are 4 Unarmed perks that the player can acquire as quest/faction rewards. While they are going to be summarised below, it’s recommended that you read the full guides for further details as well as details on how to acquire them.
Ranger Takedown (Guide): A powerful attack that can be acquired very early. Using it will knock down the enemy that it hits, which can be powerful both as a means of defense and offense. Overall, it’s a must for all Unarmed builds.
Legion Assault (Guide): Very similar to the Ranger Takedown, but more offensive as it moves the player forward rather than stopping them in place. This is the best of all of the special moves by a landslide. Get it as soon as you can.
Khan Trick (Guide): The Khan Trick is meant to allow the player to stun their opponent, but it largely fails at this for the most part. Even if it worked properly, it’s better to knock your opponent down, rather than stun them.
That, combined with the difficulty of acquisition and the numerous bugs associated with the quest needed to learn the Khan Trick, means that you can skip this Unarmed move without much trouble.
Scribe Counter (Guide): A very useful attack that allows the player to survive more easily in combat encounters with foes that use Unarmed or Melee weapons. If you’re having problems surviving a combat encounter, this might just be the trick you need. Overall, highly recommended.
Implants
As with most builds, to get the most out of your weapons and the build overall, you’ll need to buy several implants.
Specifically, you need to buy the Endurance implant, the Perception implant, the Intelligence implant, the Agility implant, the Luck implant, and the Sub-Dermal Armor implant.
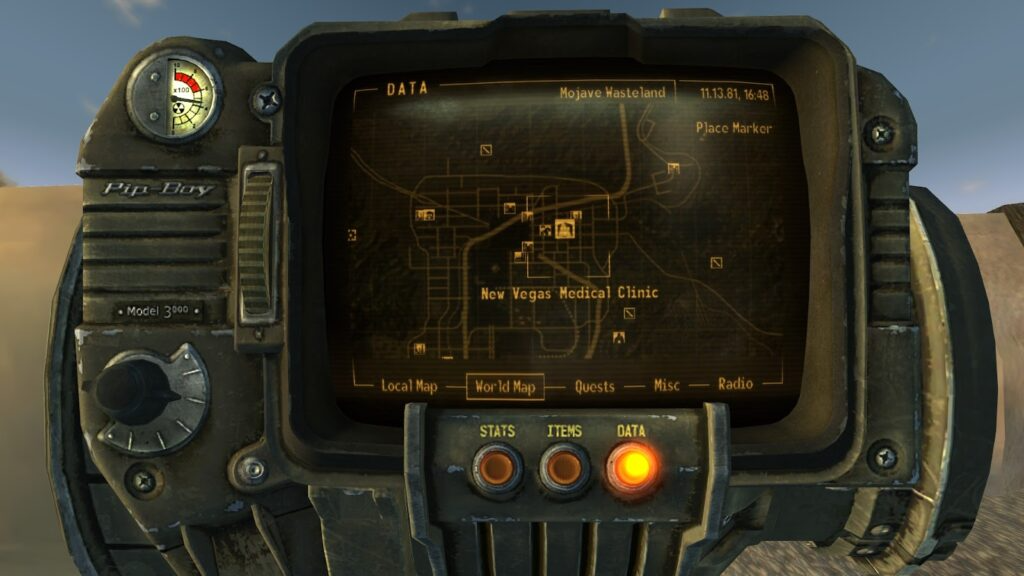
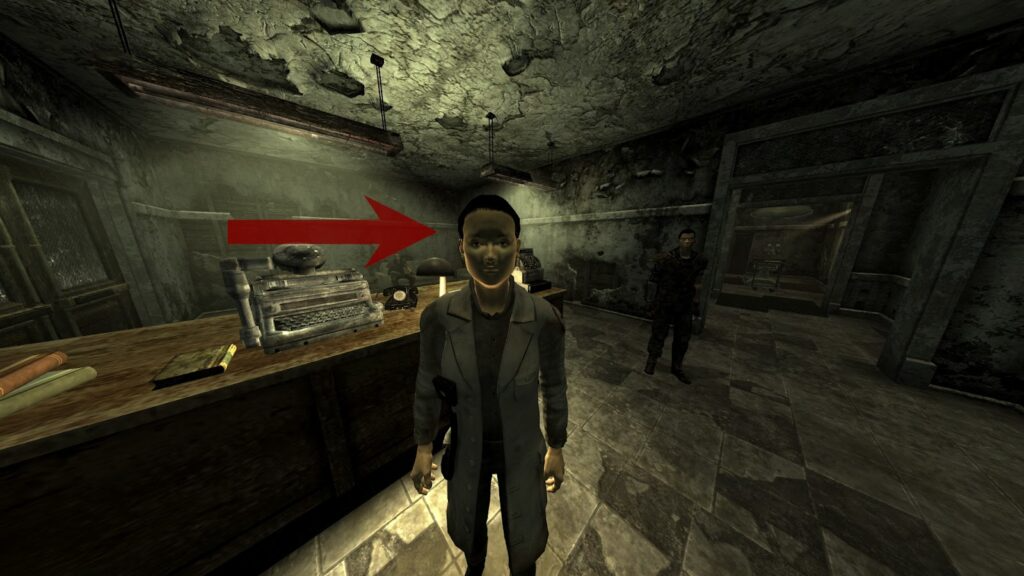
All of these implants combined will cost you 14 000 caps. While this may seem like a lot, you’ll save a lot of money with this build compared to others because you don’t have to buy ammo.You can buy these implants from Doctor Usanagi, located at the New Vegas Medical Clinic.

Weapons
The Unarmed weapons of Fallout: New Vegas are some of the most varied weapons available. Mixing and matching several different weapons and using them accordingly depending on the situation is highly recommended.
One thing to note: If you can’t acquire any of the weapons below, or they simply don’t suit your playstyle, the Gun Runners usually sell great unarmed weapons throughout the game, like the Ballistic Fist or the Mantis Gauntlet, or even the unique Ballistic Fist called “Two-Step Goodbye”, as a general rule, you can never go wrong with any of these.
Primary Weapons
| Name of the weapon | Fist of Rawr (Fist of the North Rawr) | Pushy | Paladin Toaster | Industrial Hand |
| Pros | – High Base Damage- High knockback power- Fast Attack Speed | – Spectacular Base Damage- High knockback power- Fast Attack Speed- No DLC required | – Amazing against robots/power-armor wearing enemies- Decent damage for its class | – Fully Automatic- Most powerful automatic weapon for critical hits in the entire game- High Base Damage- Excellent Durability- Ignores enemy Damage Treshold and Damage Resistance |
| Cons | – Difficult acquisition- Lonesome Road DLC required | – Weaker against non-robotic foes when compared to the other listed weapons. | – Can be expensive/difficult to repair.- Other than the Scribe Counter, none of the special Unarmed moves can be performed with this weapon. | |
| Quick Analysis | An amazing weapon that can be used to great effect by any Unarmed build. A great workhorse weapon. | Basically a base-game version of the Fist of Rawr that can be acquired more easily, at the cost of some damage. A great choice if you can’t get the Fist of Rawr. | A great weapon for fighting robots and foes in power armor. Turns the Old World Blues DLC into a breeze. It’s highly recommended that you always keep this weapon on hand. | If you want to lean into the Critical Hit part of this build, then this weapon is for you. There are several bugs/errors associated with this weapon that make it one of the most powerful weapons in the entire game. |
| Links for further information | Weapon Guide | Weapon Guide | Weapon Guide | Weapon Guide |
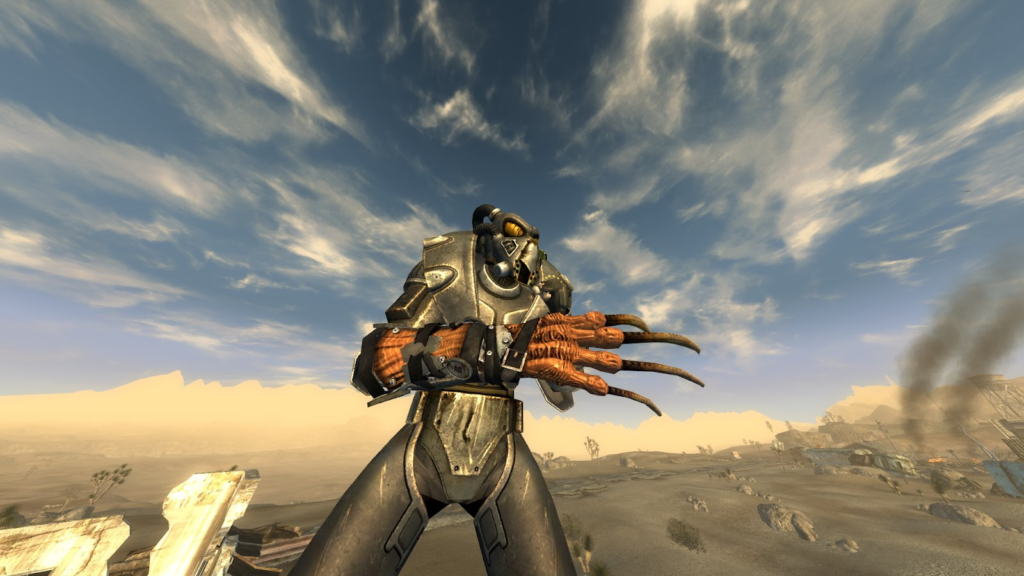
Supplemental Weapon: Dr. Klein’s Glove
While not a necessary addition to the build, Dr. Klein’s Glove can prove to be an incredible weapon when paired with the rest of this build.
In short, hitting an enemy with this weapon causes them to take debuffs to their Strength and their Energy Weapons skill. If you cause a critical hit, the Strength debuff is intensified and the enemy takes an additional penalty to their Damage Threshold.
The strategy to use this weapon is simple: Whenever you’re fighting a powerful opponent, hit them a few times with this weapon first. After 2-3 hits, you can switch back to your main weapon to finish the enemy off.
If you have either the Legion Assault or the Ranger Takedown special Unarmed move, you can also perform one of them before switching back to your main weapon.
Armor
Due to the nature of this build, only one armor set is capable of properly protecting the player. That being the Remnants Power Armor and Remnants Power helmet.
There are 2 ways of acquiring this armor. If you already have Power Armor Training, then I recommend that you follow this guide, as that is the fastest way of getting the armor.
If you don’t have Power Armor Training, or you don’t feel like going through the Deathclaw Promontory, then you can follow this guide instead, as that route gives you both the necessary Power Armor Training as well as a full set of Remnants Power Armor.
Chems and Consumables
Chems are usually overlooked, however, they can be incredibly powerful tools, especially for Unarmed/Melee builds. Here are some of the best ones:
Med-X: Gives a flat 25% Damage Resistance.
Psycho: Gives a flat 25% Damage bonus with all weapons.
Slasher: Gives the effects of both Med-X and Psycho at once. While the bonus Damage does not stack with Psycho, the bonus Damage Resistance stacks with Med-X. It can be crafted at a campfire as long as the player has a Science skill of 50 or more.
Rushing Water (Lonesome Road DLC required): Gives a 50% bonus to attack speed. This bonus stacks additively with the Slayer perk for a total of 80% bonus. It can be crafted at a campfire as long as the player has a Survival skill of 50 or more.
Weapon Binding Ritual (Honest Hearts DLC required): Restores some Limb Condition and grants a flat 10 bonus damage with Unarmed weapons. This is absurdly powerful with the Industrial hand, but it’s useful with all Melee and Unarmed weapons. It can be crafted at a campfire as long as the player has a Melee Weapons skill of 25 or more.
Poisons
Like Chems, poisons are an often overlooked mechanic, however, they are some of the best ways of dealing extra damage with your Unarmed weapons.
Keep in mind that a poison only applies once, that being on the next hit with the weapon you applied the poison on.
Here is a list of the best poisons:
Cloud Kiss (Lethal) (Dead Money DLC Required): Most powerful poison by damage dealt (13 damage/second, lasts for 13 seconds, dealing 169 damage in total).
It can be crafted at a campfire as long as the player has a Survival skill of 75 or more. Keep in mind that the Cloud Residue needed to craft this poison can only be acquired in the Sierra Madre, which you cannot re-enter after leaving it.
Bleak Venom: While slightly weaker than the Cloud Kiss, it can be acquired much more easily and also deals its damage slightly faster (15 damage/second, lasts for 10 seconds, dealing 150 damage in total).
It can be crafted at a campfire as long as the player has a Survival skill of 50 or more.
Tremble: While it doesn’t deal much damage (2 damage/second, lasts for 20 seconds, dealing 40 damage in total), it also decreases the target’s Guns, Explosives, Energy Weapons, and Melee Weapons skills by 50 for 20 seconds. This makes the target miss more frequently with ranged weapons, attack slower with melee weapons and deal less damage with all weapons other than Unarmed ones.
It can be crafted at a campfire as long as the player has a Survival skill of 90 or more.
Final Tips
- Healing items. Your proximity to enemies will inevitably make you take damage often, so always keep a supply of healing items on you.
- Veronica, Lily, or Cass all work great as companions and complement this build’s playstyle. Alternatively, Boone is a great companion choice, as he is great at taking out enemies at a range, which are more difficult to kill with this build.